Soy-Free Sushi

If I am being honest, the thought of making sushi at home seemed like a daunting task. However, I was quite wrong! While there is a decent amount of prep, it’s a lot easier than you might think…
I haven’t eaten sushi in YEARS since my body does not tolerate soy. Recently my husband Clarke proposed the idea for us to make sushi. So on a Saturday when we had no plans I dove into creating soy-free various Asian recipes, one being sushi.
The two biggest advantages of making sushi at home…
You can make whatever combo(s) you want for your taste or allergies
You get WAY more bang for your buck
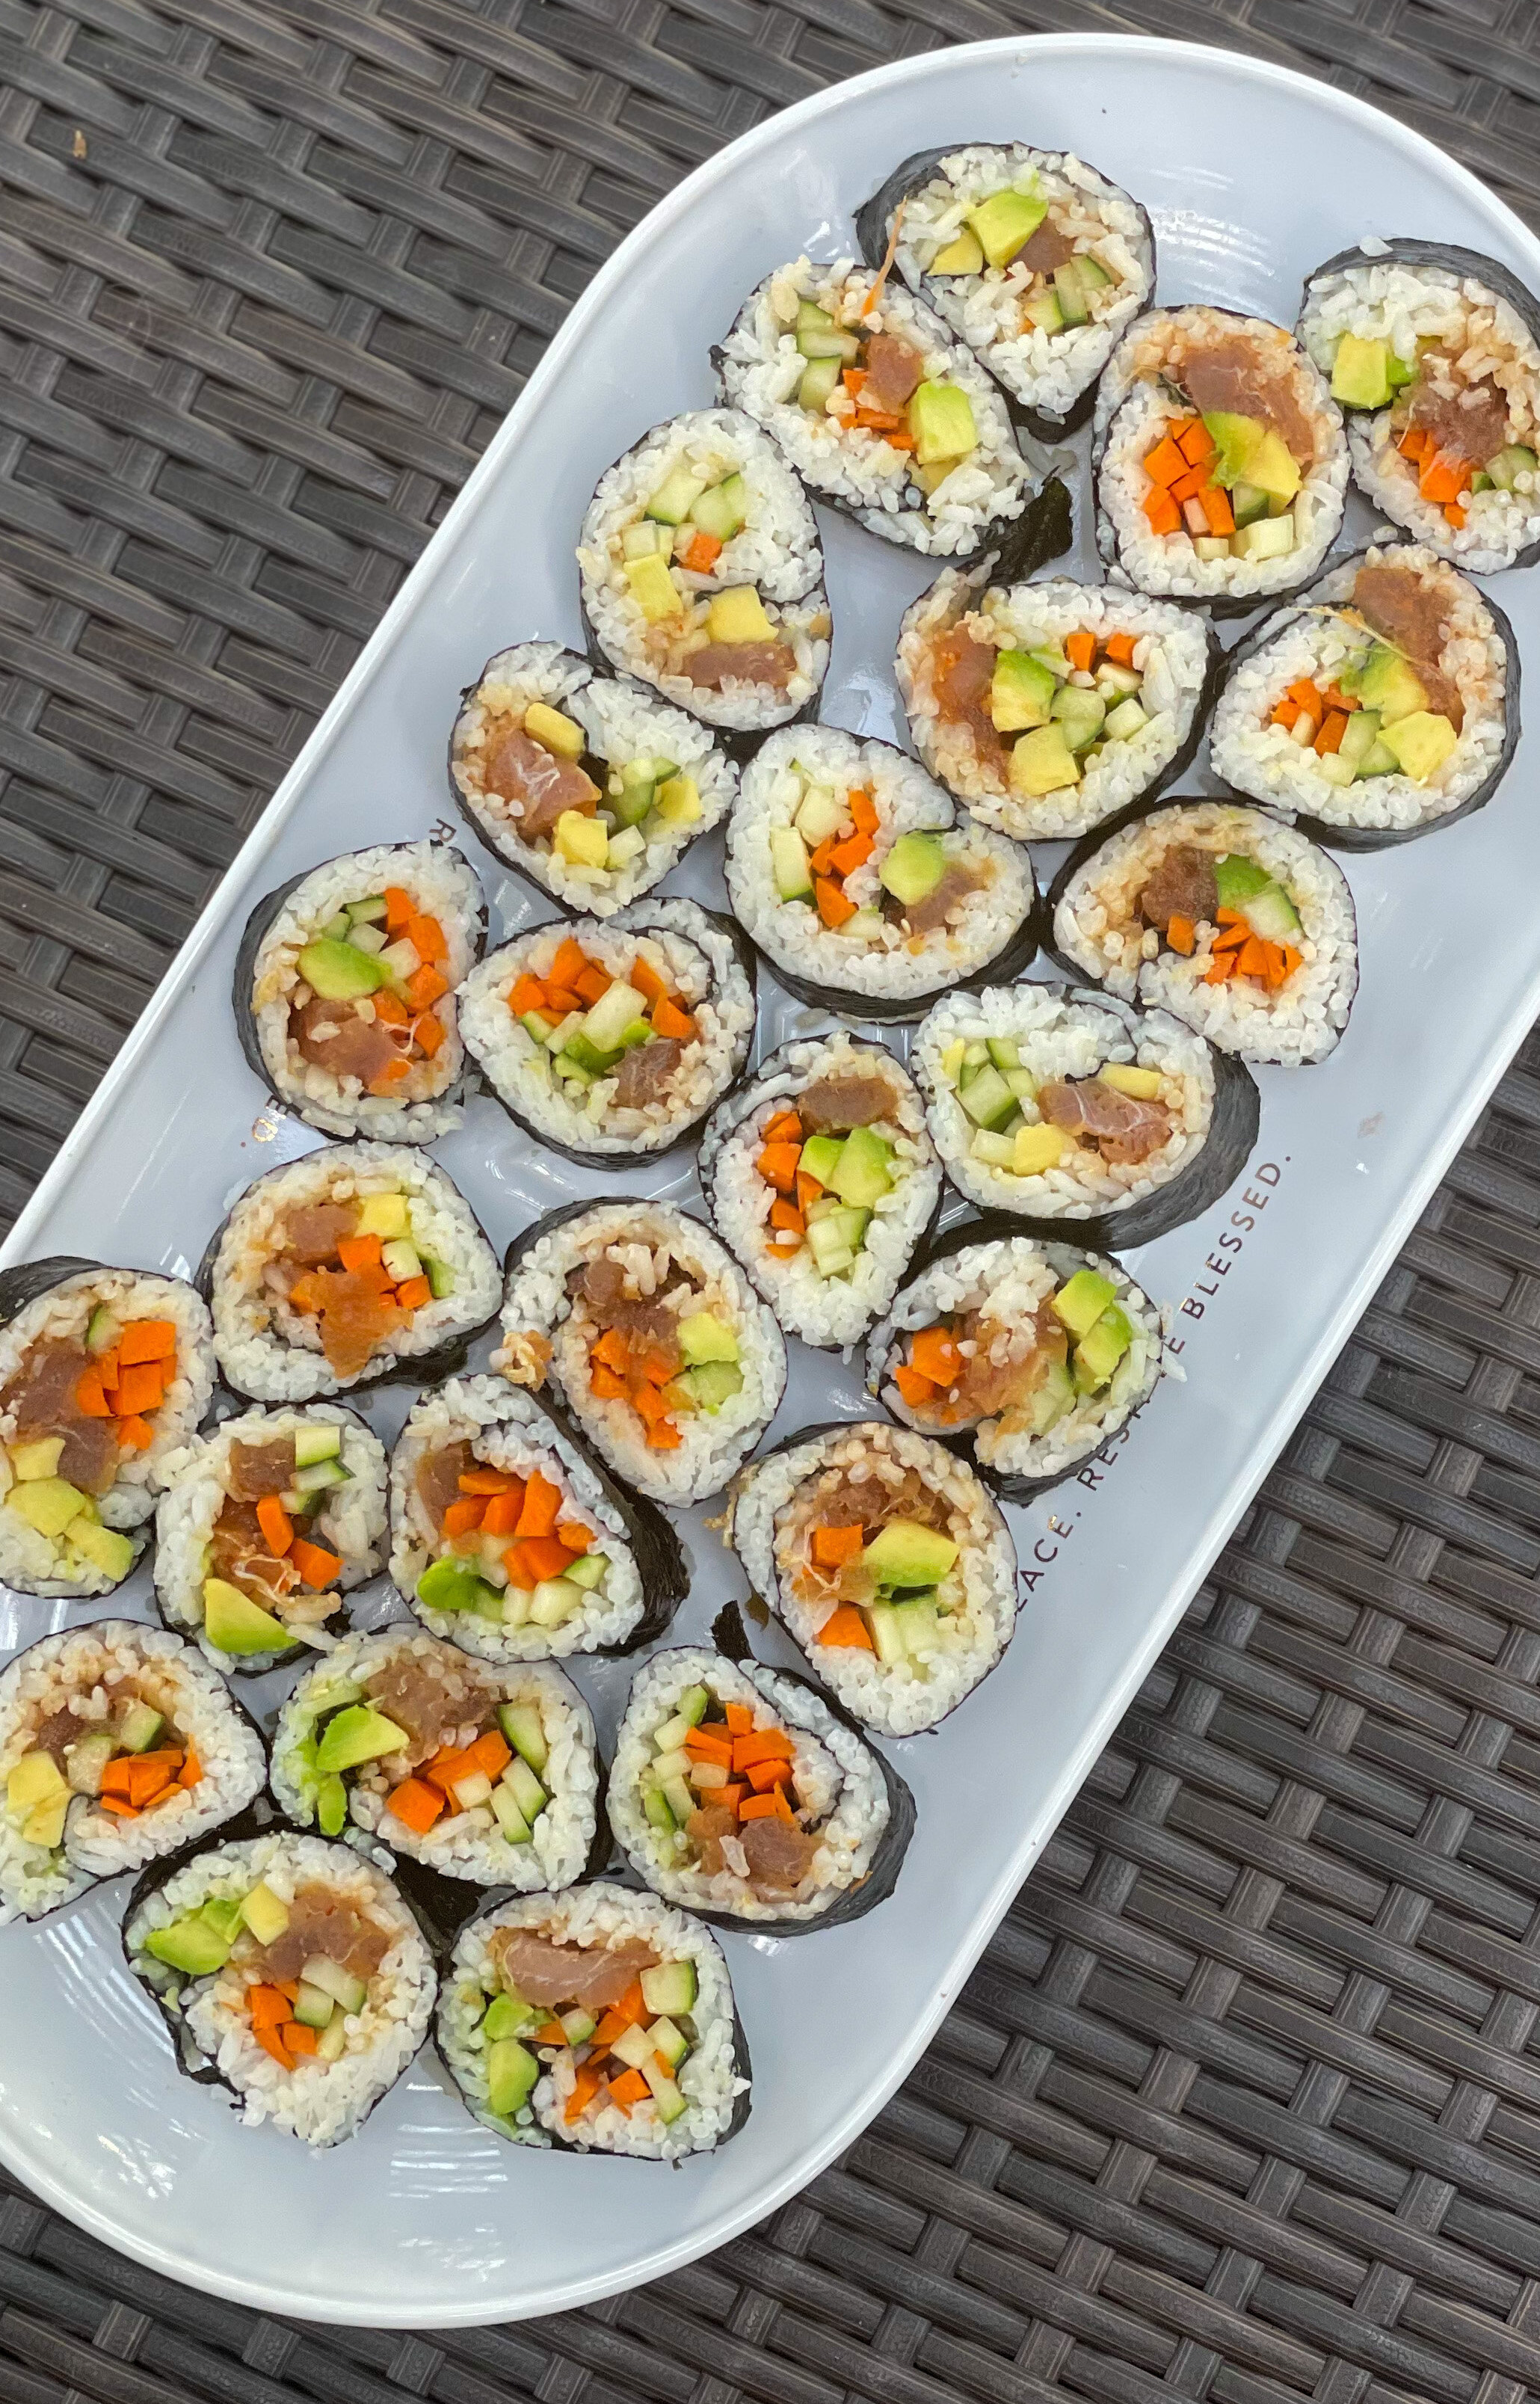
We did not have “sushi rice” or a bamboo sushi rolling mat, and everything still turned out well enough for me to add “Sushi Chef” to my resume according to Clarke.
I’ve shared the ingredients we used below, but feel free to add/remove as you desire.
Ingredients:
1 package of Sushi Nori
2 cups dry Jasmine Rice
1 - 2 T Ghee (or butter if you tolerate dairy)
Rice Vinegar
Cup of water (to seal the sushi rolls)
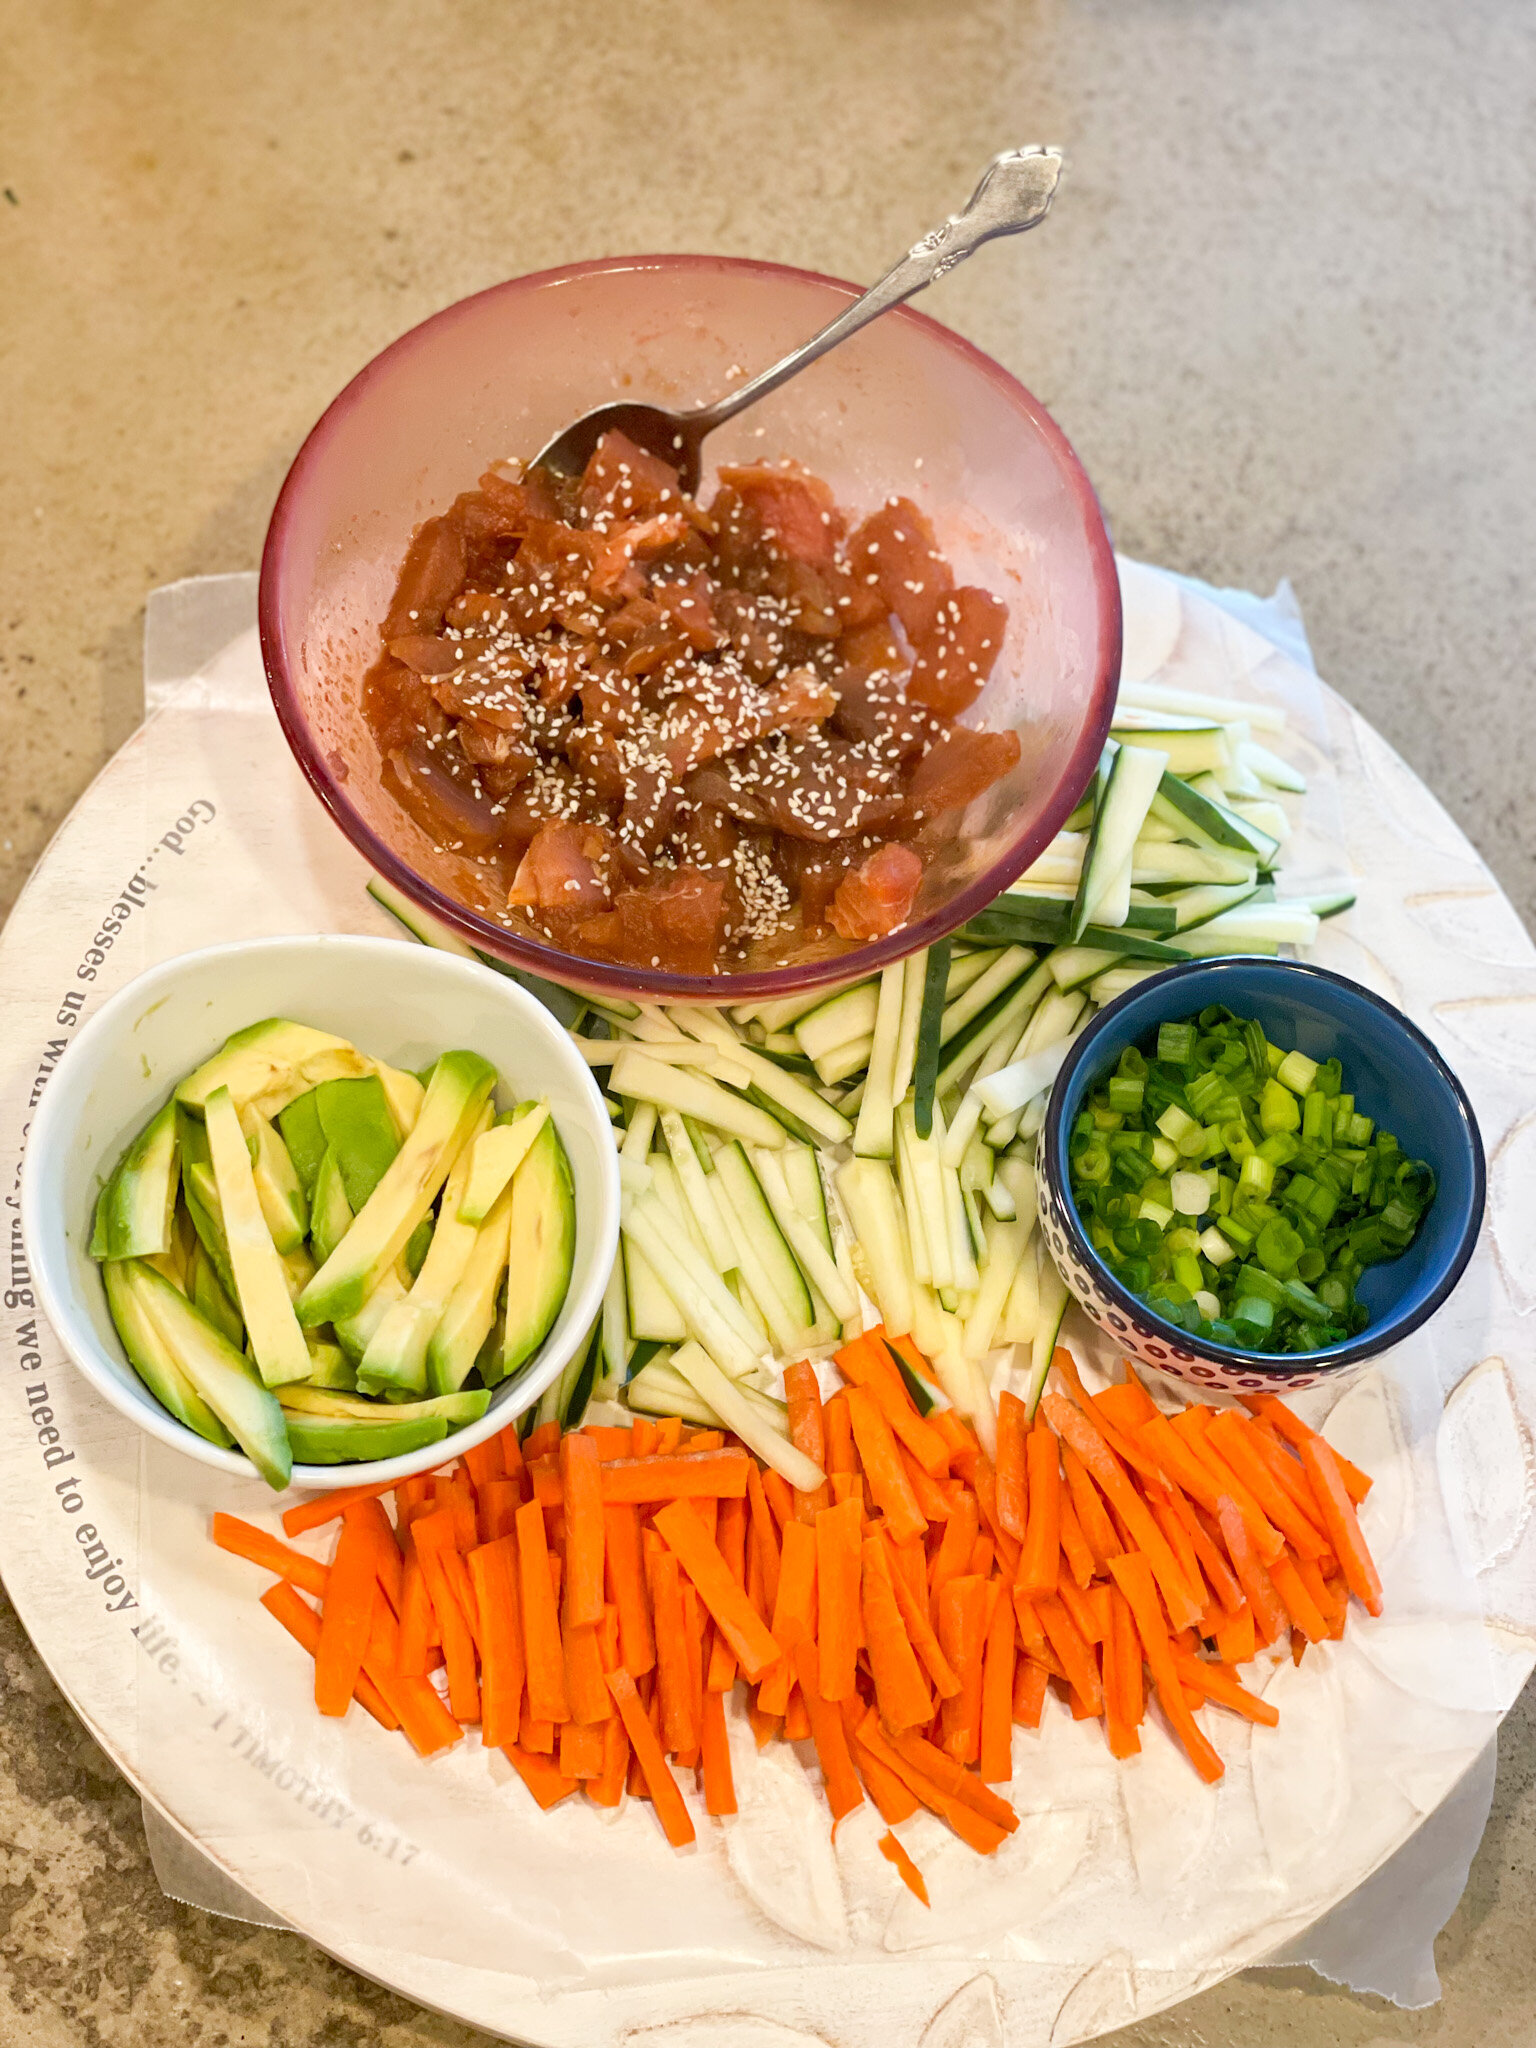
1 Cucumber, sliced into tiny matchsticks
2 Carrots, sliced into tiny matchsticks
1 Avocado, sliced into tiny matchsticks
Soy-free Poke Tuna from 2 wild-caught Yellowfin Tuna Fillets (recipe linked here)
Coconut Aminos & Sriracha for serving (optional)
Instructions:
Prepare the Poke Tuna and place it back in the fridge while you prepare the other components.
Cook rice according to package instructions, adding 1 - 2 T ghee/butter
While rice is cooking chop up your veggies
Once rice is cooked, drain the water and spread the rice out on a cookie sheet to cool completely. Once cooled, sprinkle rice vinegar over all of the rice to help give your rolls that sushi flavor
Place one Nori sheet on a cutting board, and spread an even layer of rice on it leaving ~1 inch uncovered along the edge closest to you. This will allow the sushi to be sealed once rolled.
Lay each of your ingredients in rows on top of the rice. Be careful not to put too much of any ingredient or your roll will be too full.
Dip your fingers in water and get the open Nori edge wet.
Begin tightly rolling the sushi towards you, starting with the end furtherest away from you. Use your thumbs to push the roll tight, and your other fingers to continue to roll towards you. Press the wet edge on the roll to seal it.
Use a serrated knife to cut rolls to desired size.
Serve with coconut aminos & sriracha, and enjoy!
